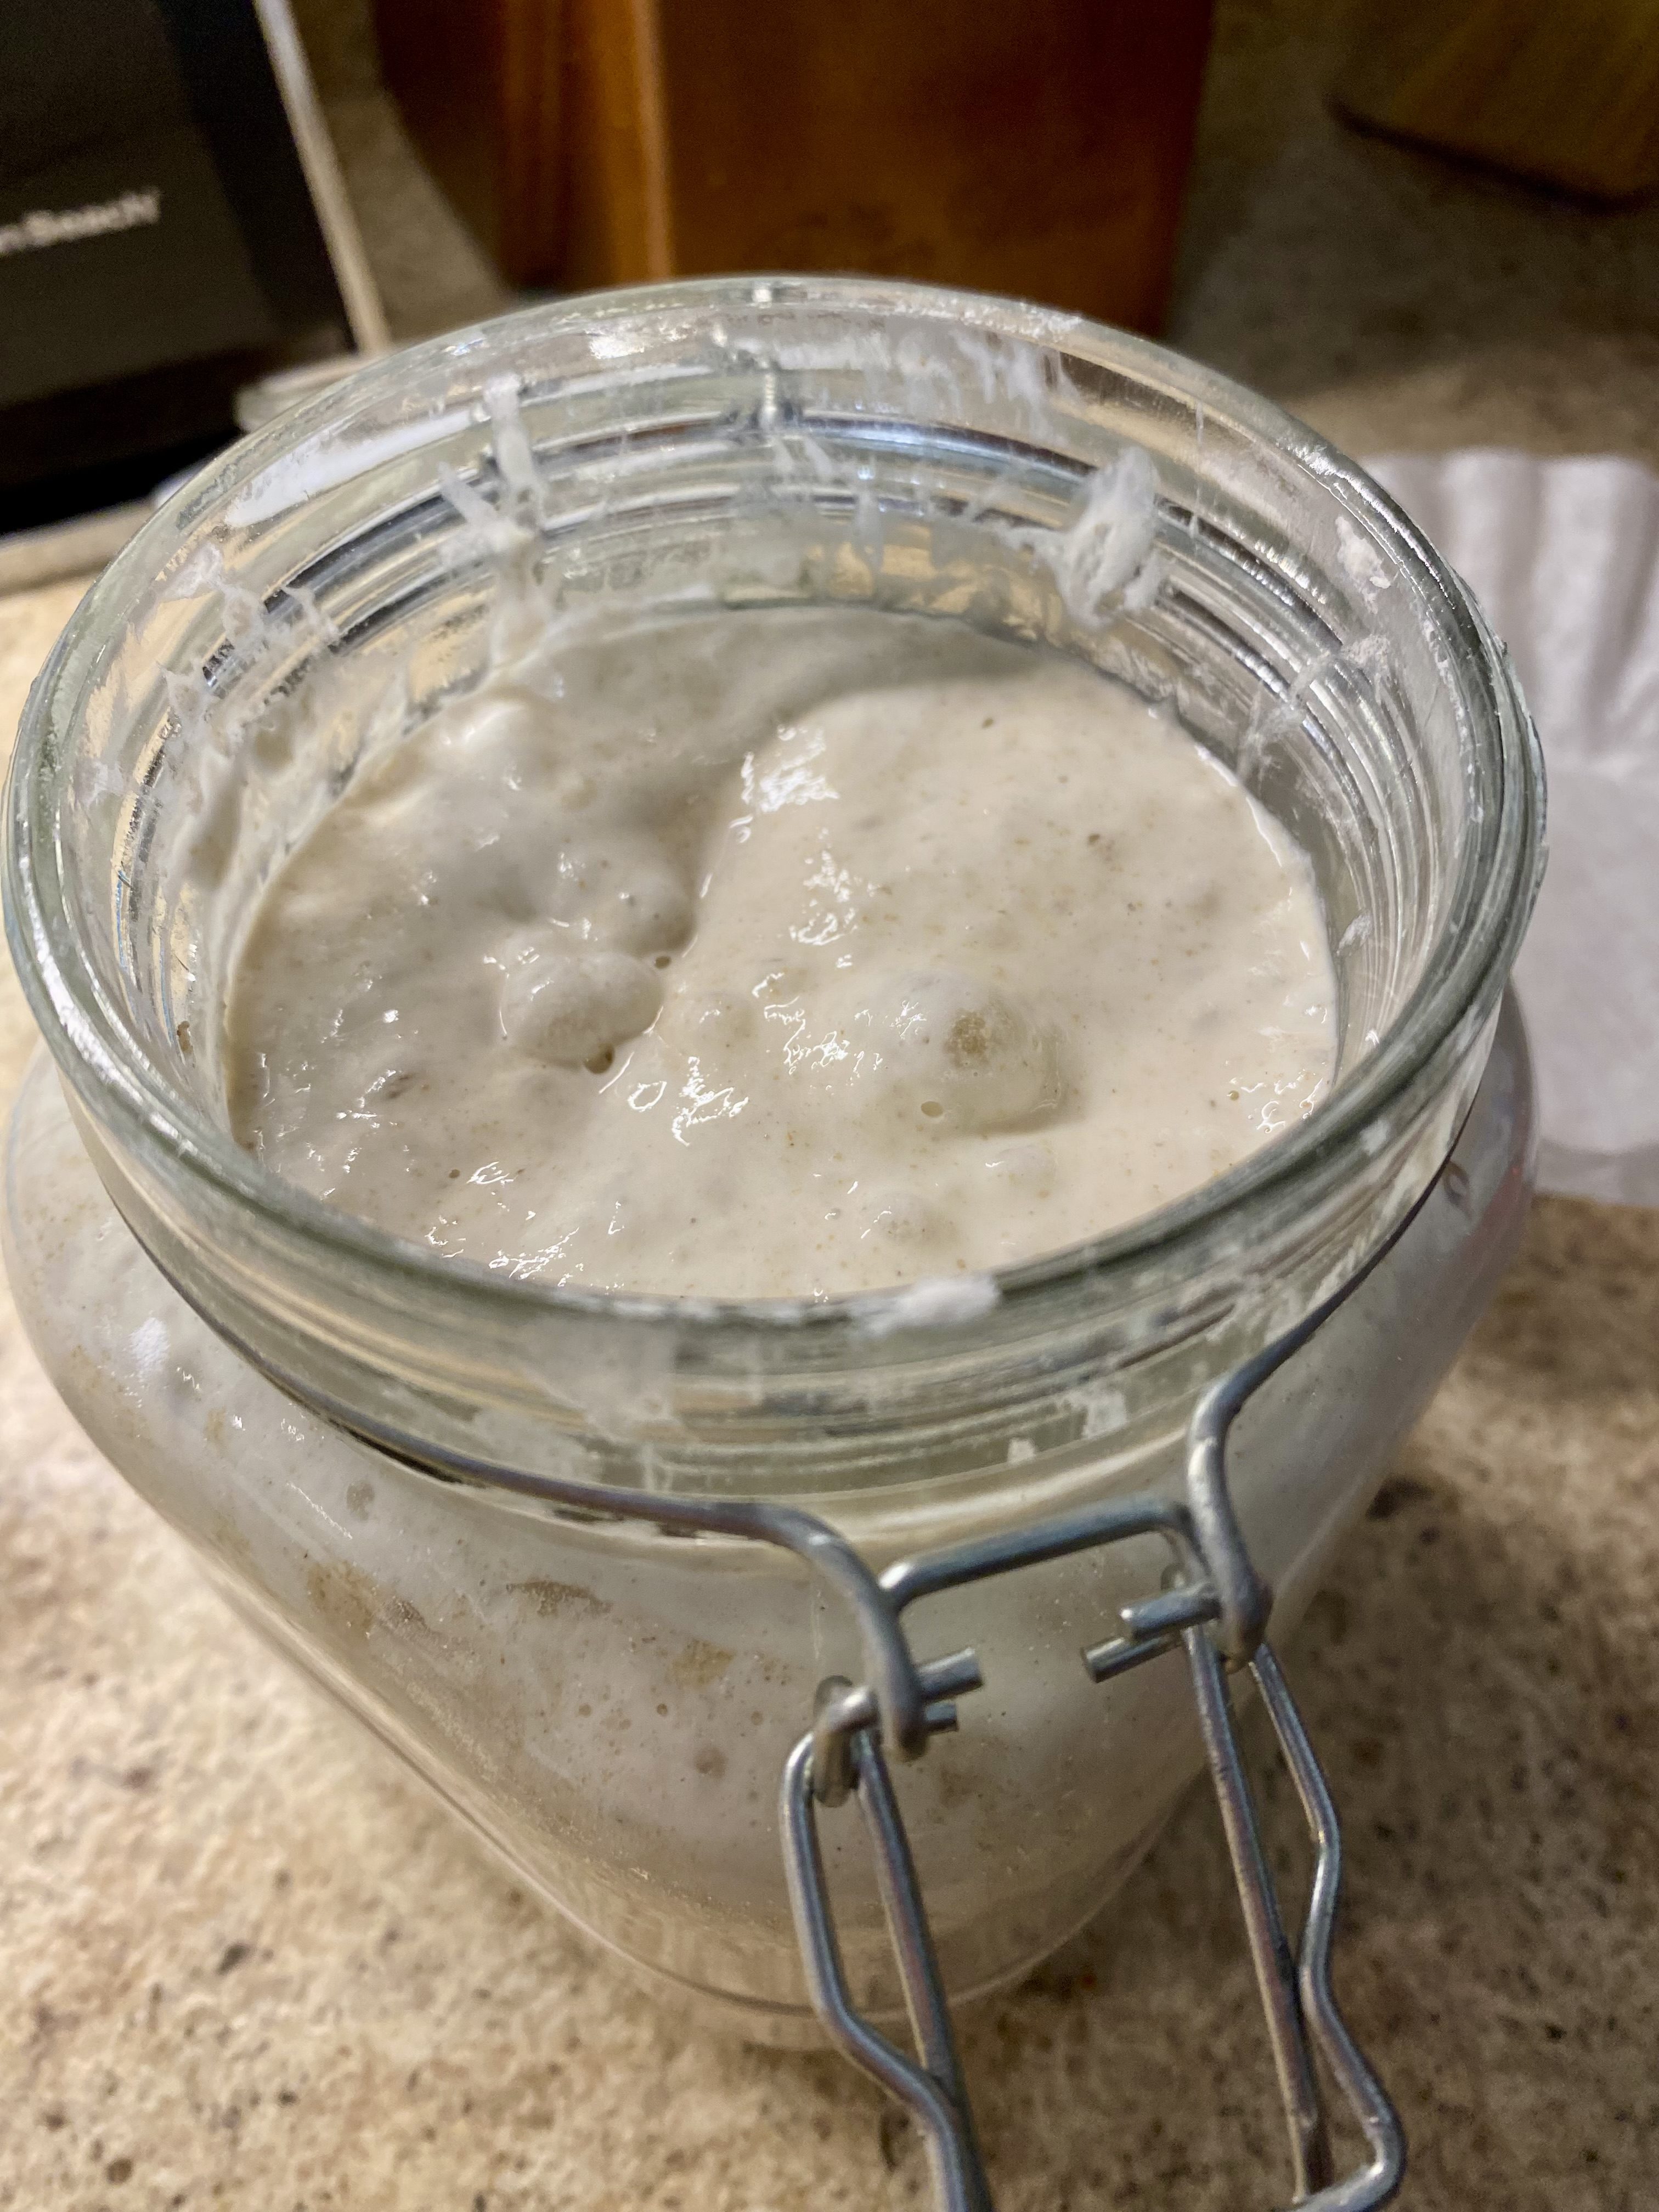
Making your own sourdough starter might sound intimidating at first, but it is actually one of the simplest things you can make. All you need is flour, water, a jar, and some patience.
Once your starter is established, you can use it to make everything from sourdough bread and waffles to pancakes, biscuits, rolls, muffins, and more.
You don’t need any special equipment or a fancy sourdough starter kit. You can start one today with ingredients you probably already have in your pantry.
What Is a Sourdough Starter?
A sourdough starter is a mixture of flour and water that has been allowed to naturally ferment. Wild yeast and beneficial bacteria naturally found in flour and the environment begin feeding on the flour. As the starter ferments, it produces carbon dioxide, which is what gives sourdough bread its rise, along with the pleasantly tangy flavor sourdough is known for.
Think of your starter as a living culture that you maintain by regularly feeding it fresh flour and water.
What You Need
You only need a few basic supplies to make a sourdough starter.
- A clean glass jar (a mason jar will work just fine)
- Flour (unbleached is preferred)
- Water
- A kitchen scale (nice to have, but not technically needed)
- A spoon or small spatula
- A loose-fitting lid or cover
I highly recommend using a kitchen scale rather than measuring your flour with cups. Flour can vary significantly in weight depending on how you measure it, and weighing your ingredients makes feeding your starter much more consistent. However, you can totally use a 1:1 ratio of flour and water; make sure the consistency is like pancake batter.
What Flour Should You Use?
You can make a sourdough starter with regular all-purpose flour, whole wheat flour, rye flour, or freshly milled wheat.
Whole grain flour can be especially helpful when you’re first establishing a starter because it contains more of the naturally occurring microorganisms and nutrients that help fermentation get going.
Once your starter is established, you can continue feeding it with whatever flour works best for you. If you’re milling your own flour, freshly milled wheat can make a wonderful sourdough starter.
How to Make Sourdough Starter
For this method, we’re going to keep things very simple and use equal weights of flour and water.
Day 1
Add 50 grams of flour and 50 grams of water to a clean jar.
Stir until there are no dry patches of flour remaining.
The mixture should resemble a thick pancake batter. If it seems extremely thick, you can add a tiny amount of water, but don’t worry if it isn’t perfectly smooth.
Cover the jar loosely and leave it at room temperature.
You don’t want to seal the jar tightly because fermentation produces gas.
Day 2
You may or may not see bubbles today.
That’s okay!
Some starters become active very quickly, while others take several days before you see consistent signs of fermentation.
Discard approximately half of the starter.
Then add:
- 50 grams flour
- 50 grams water
Mix well, cover loosely, and leave at room temperature again.
Day 3
You may start seeing bubbles, a pleasant fermented smell, or even some noticeable growth.
Repeat the same process:
- Discard half of the starter.
- Add 50 grams flour.
- Add 50 grams water.
- Stir well.
- Cover loosely.
- Leave at room temperature.
Days 4–7+
Continue feeding your starter every 24 hours.
As your starter becomes more active, you may notice it rising after a feeding and then falling back down once it runs out of food.
You might also notice a stronger sour or fermented smell. That’s completely normal.
Eventually, your starter should become predictable: you feed it, it rises, reaches its peak, and then begins to fall.
That’s when you know you’re getting close to having an established starter.
How Do I Know My Sourdough Starter Is Ready?
Don’t rely solely on the number of days your starter has been alive.
Some starters are ready in about a week, while others can take two weeks or longer.
A mature starter should:
- Rise consistently after feeding
- Have lots of bubbles throughout
- Have a pleasant fermented, tangy smell
- Become noticeably larger after feeding
- Reach its peak and then begin to fall
One of the easiest ways to keep track of its activity is to place a rubber band around the jar at the level of the starter immediately after feeding it.
This gives you an easy visual reference for how much it has risen.
The Float Test
You may have heard of the sourdough float test, where you drop a little starter into water to see whether it floats.
While it can sometimes be useful, I don’t recommend using the float test as your primary way of deciding whether your starter is ready.
A starter that consistently doubles or triples in size after feeding is a much more useful indicator of strength.
What If My Starter Isn’t Doing Anything?
Don’t panic! A slow starter doesn’t necessarily mean you’ve done anything wrong. Temperature can make a huge difference. A starter kept in a cool kitchen may take considerably longer to become active than one kept somewhere warm.
The type of flour you use can also affect how quickly your starter develops. If you’re seeing very little activity after several days, try keeping your starter somewhere slightly warmer and continue with regular feedings.
Avoid constantly changing your feeding routine. Sourdough thrives on consistency.
What If My Starter Suddenly Explodes With Activity?
This is actually very common! Sometimes a new starter becomes extremely active around days 2–4. It may double or even triple in size. It can look like you’ve already created a strong, mature starter.
But don’t get too excited just yet! This early burst of activity is often caused by microorganisms that thrive during the initial stages of fermentation. The starter may slow down significantly afterward before developing into a stable sourdough culture.
If your starter suddenly seems less active after those first few days, don’t throw it away and start over. Keep feeding it. It is normal for a new starter to go through an active period followed by several quieter days.
How Often Should I Feed My Starter?
When you’re establishing a starter at room temperature, feeding it approximately every 24 hours is a good place to start.
Once your starter becomes very active, you may find that it needs to be fed more frequently depending on how quickly it consumes its food. For example, if your starter consistently doubles and then collapses well before 24 hours, it may be ready for more frequent feedings or a larger feeding ratio.
There isn’t one feeding schedule that works perfectly for every kitchen. Temperature, flour, hydration, and the strength of your starter all affect how quickly it ferments.
How to Maintain Your Established Starter
Once your starter is mature, you don’t have to keep a large jar of starter sitting on your counter and feeding it every day. If you bake frequently, you can keep your starter at room temperature and feed it regularly.
If you only bake occasionally, or just forgetful like me, you can store your starter in the fridge. A refrigerated starter generally needs less frequent feeding than a starter kept at room temperature.
When you’re ready to bake, take it out, feed it, and give it enough time to become active again before using it.
Don’t Throw Away Your Sourdough Discard!
One of my favorite things about maintaining a sourdough starter is that the discard doesn’t have to go in the trash, except for when you are trying to establish the starter. Do not use the discard until your starter is fully established, throw it away!
Sourdough discard can be used in so many recipes!
Try using it to make:
- Sourdough discard waffles
- Pancakes
- Muffins
- Biscuits
- Crackers
- Pizza dough
- Cookies
- Flat-breads
- English muffins
Once you start keeping sourdough, you’ll probably find yourself looking for ways to use the discard rather than throwing it away.
Troubleshooting Your Starter
My starter smells sour.
That’s normal! A mature sourdough starter should have a fermented, tangy smell. Depending on your starter, it may smell yeasty, pleasantly sour, or slightly vinegary.
My starter smells like acetone or nail polish remover.
This usually means your starter is very hungry. Try feeding it more frequently or using a larger feeding ratio.
My starter has liquid on top.
You may see a layer of liquid, sometimes called hooch, sitting on top of your starter. This generally means the starter has gone quite a while without enough food.
It is fine, just stir it in. Some people recommend to pour it off, but personally I prefer stirring it back in.
My starter isn’t rising.
Make sure your starter is warm enough, that you’re feeding it consistently, and that your flour isn’t excessively old or stale.
Whole grain flour, or Rye flour can also help encourage activity in a sluggish new starter.
I see mold.
If you see fuzzy mold or unusual colored growth, it’s safest to discard the starter and begin again with a clean jar and fresh ingredients.
A Few Tips for Sourdough Success
Use a scale.
Sourdough becomes much easier to manage when you’re weighing your flour and water.
Keep your starter warm.
A comfortable room-temperature environment will generally help fermentation happen more reliably. Put the starter in the oven with the light on, the microwave, or even on a warming mat if your home is particularly cold.
If you put the starter in the oven or microwave though, put a sticky note over the buttons so the oven or microwave or oven doesn’t accidentally get turned on while your starter is in there. I have read some horror stories out there!
Don’t obsess over the clock.
Your starter doesn’t know that it’s supposed to double in exactly four hours. Watch what your starter is doing rather than relying solely on a schedule.
Be patient.
A new sourdough starter can take longer than expected to become strong and reliable.
Mark your starter.
A rubber band around the jar, or a sharpie makes it incredibly easy to see how much your starter has risen.
Don’t over complicate it.
Sourdough really isn’t difficult. Especially once the starter is established. If you want to leave it in the back of the fridge and not touch it for a year, you can totally do that and bring it back to life with a couple of feedings. It is very easy to maintain.
Homemade Sourdough Starter
Making sourdough starter from scratch is really just a matter of mixing flour and water, feeding it consistently, and giving nature time to do its thing.
Once your starter becomes active and reliable, you’ll have a natural leavening culture that you can use over and over again for years. It is also a great gift to pass on to friends and family. There are so many starters out there that have been passed on for 300+ years!
So grab a jar, some flour, and water and start your sourdough journey!
Sourdough Starter
Ingredients
- 50 g flour
- 50 g water
Instructions
- Add 50 grams of flour and 50 grams of water to a clean glass jar.
- Stir until completely combined and no dry flour remains.
- Cover loosely with a lid or breathable covering and leave at room temperature for 24 hours.
- On day 2, discard approximately half of the starter.
- Add 50 grams flour and 50 grams water. Stir well.
- Repeat the discard-and-feed process every 24 hours.
- Continue feeding until the starter consistently rises after feeding, becomes bubbly, and reliably doubles or triples in size.
- Once your starter is consistently active, it is ready to use for baking.

Leave a Reply